|
|
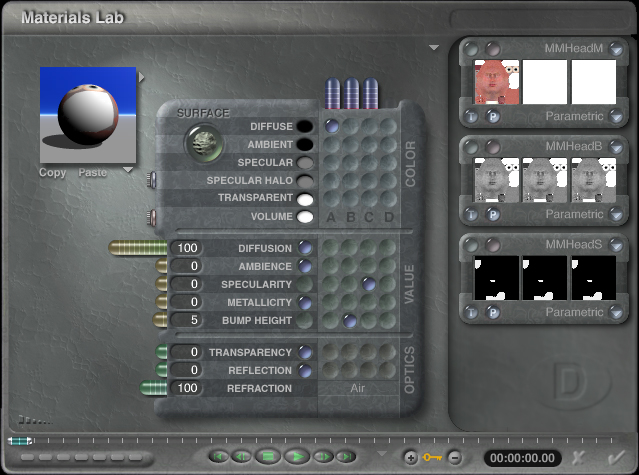
I've found that sometimes really great textures are missing a decent bump or specularity map. It's a simple process to create these maps and chances are, your finished model will significantly better for the time spent. For simplicity the samples will use Zytote's Michael as an example but these concepts apply to any Poser figure or texture. Bump MapsWhen Poser figures are exported they sometimes reference .bum files for bump maps. Unfortunately, Bryce doesn't read the .bum file format so this information is ignored. In Michael's case, Zygote does not supply a bump map in another format. So, you have to make a new bump map from the texture (color) map. The quick and dirty way is to simply copy the color channel into the alpha channel in the Bryce Picture Room. If you're working with close camera views and want better results try this:
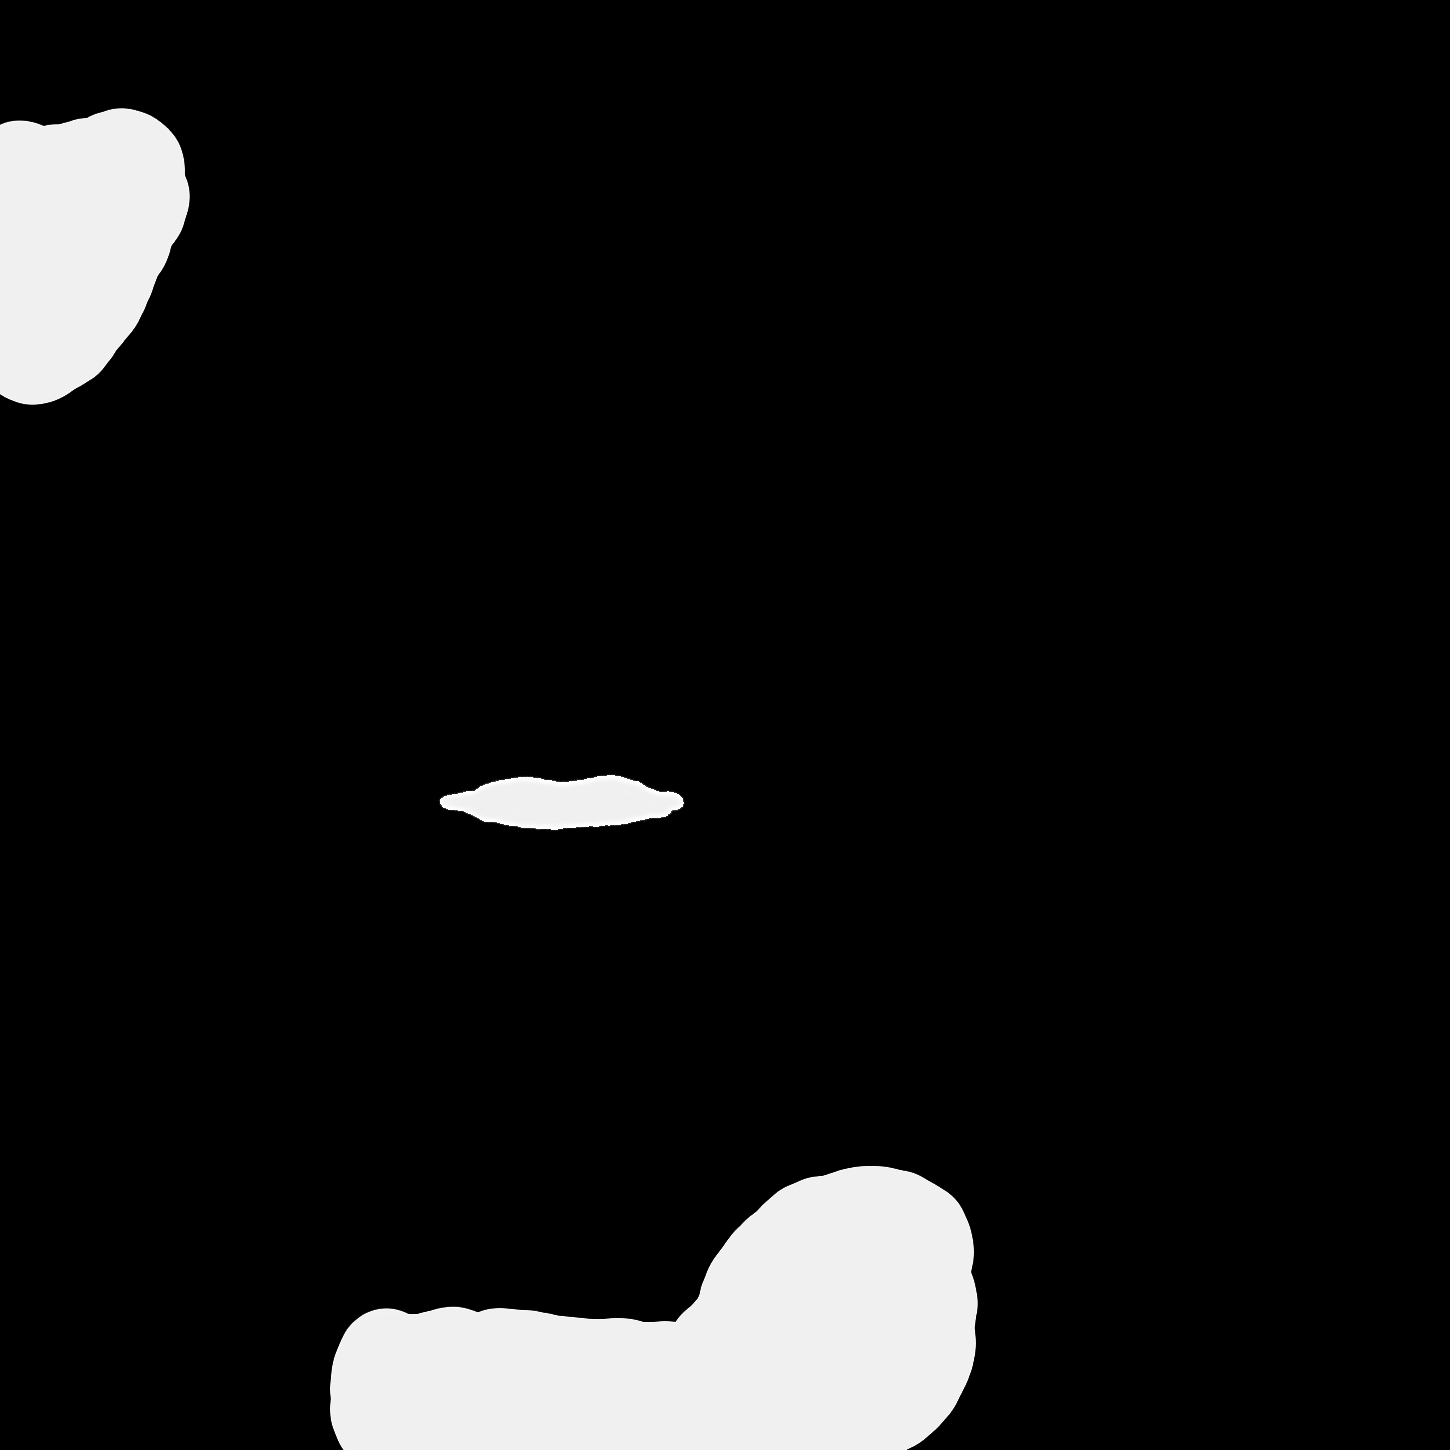
Credit for this tip goes to Harald Hall who posted it on the OneList Bryce group. Specularity MapsPeter Sharpe has a great tutorial called Bright Eyes - Moist Lips but here is an alternate way to create a specularity map. First, remember that specularity creates the illusion of moisture. Open the template for your model in your paint program and identify the areas you want to map. On a black background, paint in white the moist areas. Include the inner mouth and the lip, and lacrimal glands. Don't worry about the other eye areas if you're working with Michael. The transparent eyeball on this model will take care of everything else. Your finished map should look something like this.
Apply the specularity map to the Bryce material and you're done. Don't forget to experiment with different unmapped specularity and reflection values for "the wet look".
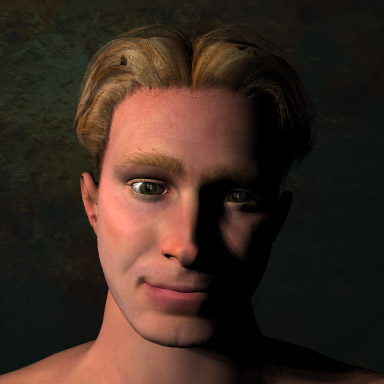
Original image
Image with mapped specularity
Specularity set to 40 (no map), Reflection set to 5 Copyright © 2000 - CJC, all rights reserved |