|
||
|
Here are a few basics to help you get started. Part 1 - Foundation TechniquesSources for 2D TexturesA wide variety of high quality image textures textures are available on the web. You'll also find textures included on the Bryce content CD. If you have a digital camera it's also a simple matter to make your own textures or generate them from Bryce or other software packages.
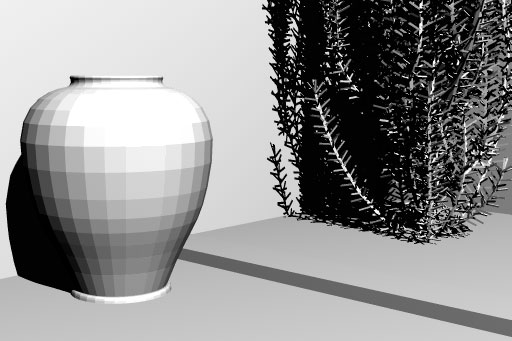
Basic GeometryLet's start with some simple geometry. Select or build models that are fairly accurate (accurate doesn't necessarily mean high polygon count) because they're foundation for your textures. Low quality models can sometimes create unwanted visual defects in the final image.
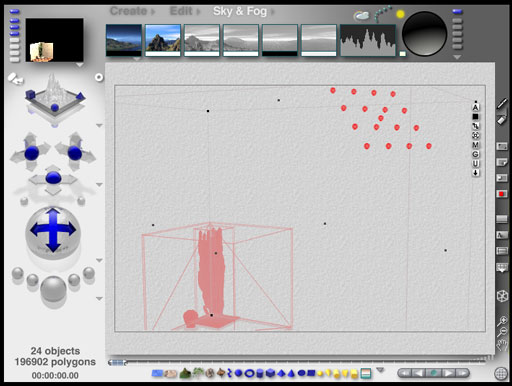
When you're using image mapped textures you don't generally need complicated geometry. The walls, floor, urn and border aren't very complicated so later, I'll add a fairly complicated texture. The taxus baccata already has a pretty complicated geometry so I'll keep it's texture simple. Balance the complexity of the texture with the complexity of the geometry for a uniform result. Converting Placeholder ObjectsOne of my favorite features in Bryce is it's ability to change one type of object into another. I can already see that the ground under the taxus baccata isn't showing up very well so I'm going to convert it to a Bryce terrain. I do that by selecting the surface, and clicking on the word Edit at the top. Click and drag over the arrows at the upper right corner of the interface to open the "Convert Selection To ..." fly-out menu. Release the mouse button over the type of object you want and Bryce will convert the selected object to that type.
Global IlluminationI also want the feel of global illumination in the final image so I modeled an array of 17 spheres arranged in a 4 x 4 grid with one additional sphere in the center of the grid. After I imported the model, I selected the spheres and converted them to omni lights because it's much easier to accurately position objects in Rhino than it is in Bryce. I used the same method as above.
This feels like a Mediterranean garden. So, for the textures, I'm thinking I'll want stucco walls, stone tile floor, tile border and something interesting on the urn. Questions and CommentsSend questions and comments to toad@castironflamingo.com. Copyright © 2002 - CJC, all rights reserved |