|
|
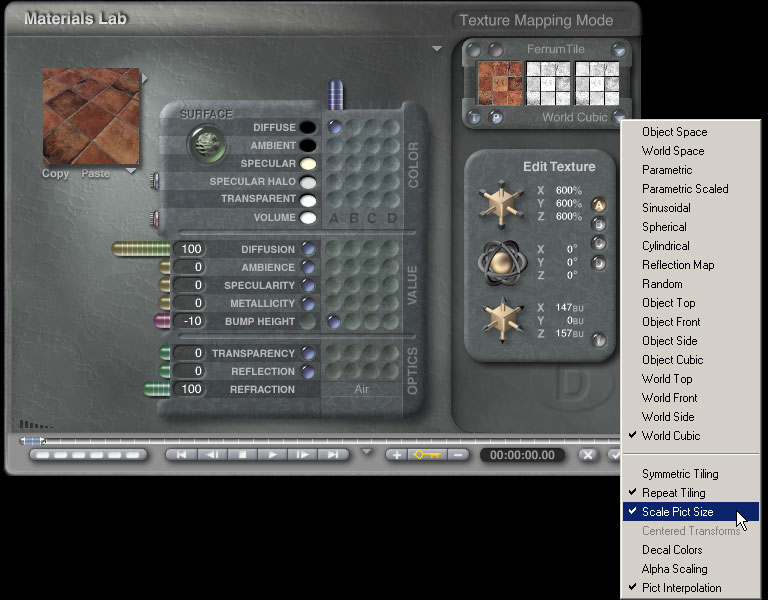
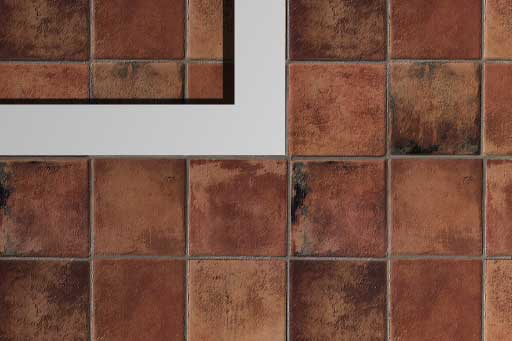
Part 2 - Simple MaterialsWalls and Floors - World Cubic MappingI tend to start with the most visually dominant elements in the scene. In this case that will be the wall, floor and ground textures. I may apply the same texture to several objects of different sizes so I'll use World Cubic mapping to make sure that the textures are scaled consistently on the X, Y and Z axes as well as between objects.
I've loaded the image texture and bump maps into the A component and assigned them to the diffusion and bump channels. In world cubic mapping mode it is essential to set "Scale Pict Size". With that set, think of the texture scale like a magnification. The higher the percentage, the closer you zoom in on the texture and the larger it appears on the object. If you don't have "Scale Pict Size" set the scale works in the opposite direction but there is a limit which may cause you problems depending on the size of the original texture.
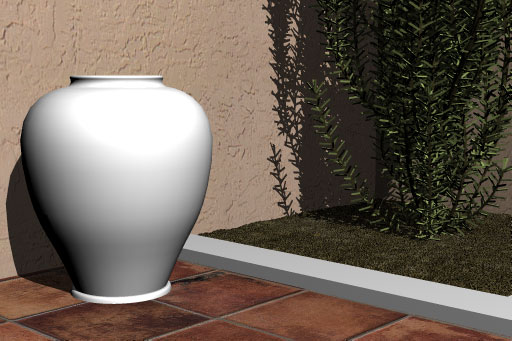
I've quickly repeated the same process for the walls and ground. I've also assigned basic color materials to the branches and needles. I'm going to let the light and shadows vary the color on those. This is starting to look like what I'm after.
Questions and CommentsSend questions and comments to toad@castironflamingo.com. Copyright © 2002 - CJC, all rights reserved |