|
Part 4 - Texturing the Eyebrows
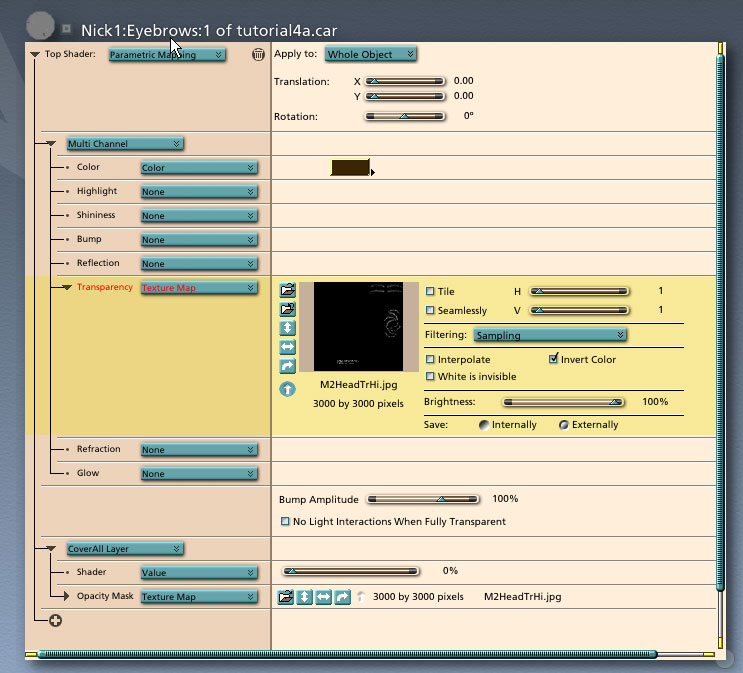
Since we grouped the Eyebrows, Upper Eyebrows and Eyelashes objects we only have to think about a single shader called Eyebrows. Many people find the eyebrows too annoying to deal with and simply delete them. I think they add a lot to a close-up and they're not that much trouble to texture correctly once you know where you're going. Mapping in CarraraWhen Carrara imported the figure it created a Multi Channel shader for each object. Carrara's default mapping mode is parametric so things looked pretty much as you would expect. The Eyebrows however, need a transparency map so the first thing to do is to change the Top Shader for the object to Projection Mapping/Parametric Mapping. Since we're only dealing with one object you can leave the Apply to set to Whole Object. Next, add a CoverAll Layer and set the Shader channel to a value of zero and assign the transparency mask to the Opacity Mask and Transparency channels. Then set the Highlight, Shininess, Bump, Reflection, Refraction and Glow channels to none or a value of zero. At this point you should have a shader that looks something like this:
I like to use the unmodified maps whenever possible so I've also checked Invert Color in the Transparency and Opacity Mask channels. Houston, we have a problem ...
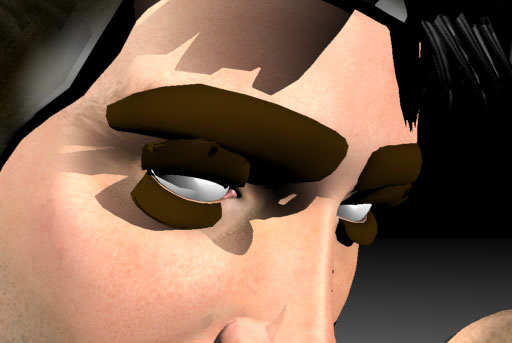
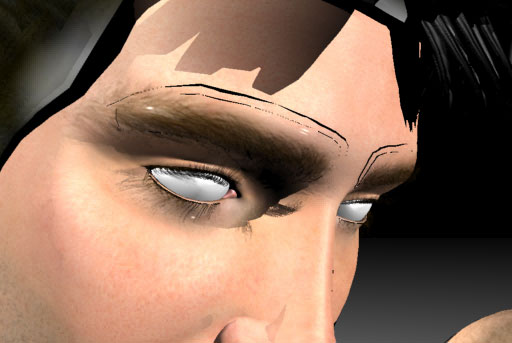
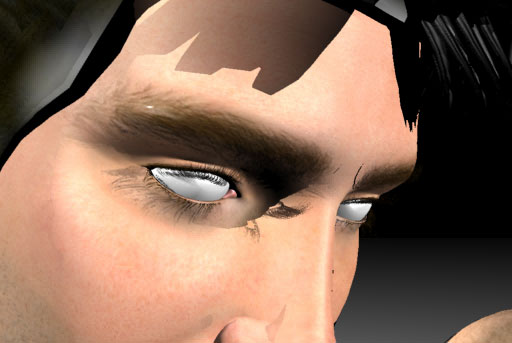
The transparency and the shadows look good but we've got some new artifacts to deal with. These appear because the eyebrow object intersects with the head and renders as black. So far, I've only figured out two ways around this.
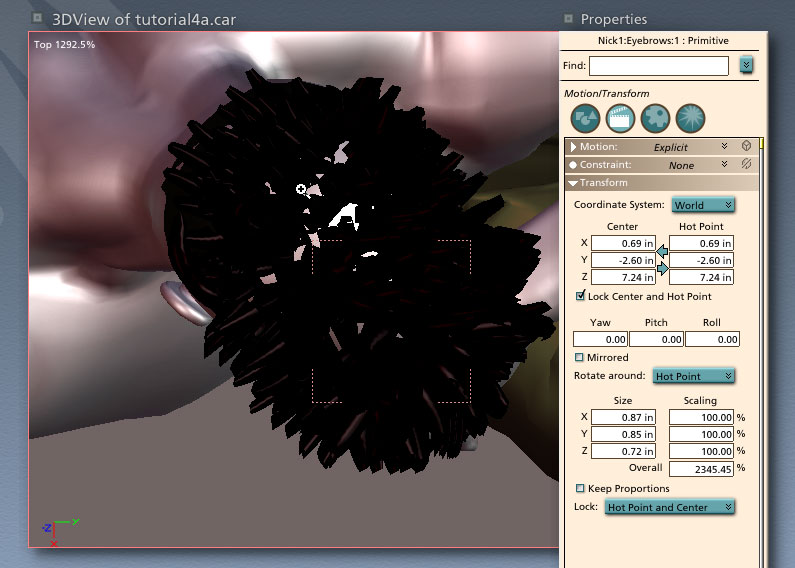
You probably know how to do the post work so let's nudge the object this time. Select the Eyebrows and go to the Top View in the Assemble room.
Notice that for this figure, the head is not aligned with an axis in the coordinate system. That means we'll have to nudge the object in two directions. I want to move the eyebrows straight away from the face, that's towards the lower right for this figure in this view. Comparing the bounding box to the orientation of the head, I'm seeing about a 45 degree angle so I'll be moving roughly an equal distance in both directions. The reference at the lower left of the window tells me I'm going to be moving in the positive X and Y directions. I don't have to move the object far and I've only got 2 displayed decimal places to work with so I'll start by entering 0.695 for the X and -2.595 for the Y and look at the result. I'll keep adding 0.005 to the X and Y values until the artifacts become less noticeable or disappear completely. The artifacts become less noticeable if you're using soft shadows so most times you don't have to move the object very far.
Copyright © 2002 - CJC, all rights reserved |