8/20/2001
The Problem
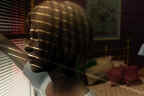
The original goal of this project was to generate a print.
Unfortunately, that requires quite a bit of time to render
at print resolution. Michelle decided she'd like to see a
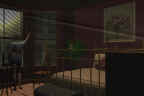
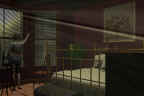
16x20 print of view 6 first and I decided I'd like see what
a large format print from EZPrints
looked like.
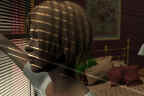
The original images were rendered at 768x512, Bryce's photo
document default. While I was waiting for Michelle to decide
exactly what size print she wanted I got a little impatient
and started a 1600x2400 render of the view just guessing she'd
want the larger size print. It took about three days to finish.
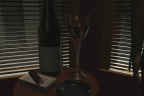
I also wanted to add signatures to the final image but the
lower right hand corner, where I wanted to add the signatures
was very dark. I didn't want to use anything but black for
the signatures so they had to be placed outside the image.
I also wasn't sure if she'd want a matt on the image when
it was framed. I didn't want to waste all that processor time
and I was concerned that the aspect ratios would cause some
unwanted clipping.
The resolution guide on the EZPrints site gave some examples
that I figured meant that they wanted at least a 100dpi image
for the best results (there is a typo that says 300dpi, ignore
it). The view had an aspect ratio of 3:2 while the print needed
an aspect ratio of 5:4.
- 768 divided by 512 = 1.5 (actually 1.5:1, multiply by
2 to get 3:2)
- 20 divided by 16 = 1.25 (or 1.25:1, multiply by 4 to get
5:4)
- 16x20 image at 100dpi would be 1600x2000
I figured that if she was going to have the print framed,
she could always have them trim the print if we left some
extra white space. Since the view is wider than it is tall
(width/height = aspect and 1.5 is greater than 1.25) I expected
to see extra space at the top and bottom of the print if we
fit the 1600x2400 image onto a 16x20 print.
The Solution
After thinking about the problem over a couple of beers I
decided to do a little more post processing. I used ImageReady
but Photoshop will work just as well. Here's what I did:
- Load the original 1600x2400.
- Set the background color to 100% white (RGB 255/255/255).
- Add a uniform border to the image for the signature line
by selecting Image/Canvas Size and change the dimensions
to 2600x1800 (adding 200 to the width and height). Make
sure you have the center tile selected so that the border
is added uniformly. I had already scanned and created a
100 pixel high signature image earlier so I'm adding 100
pixels to the top, bottom and sides of the image for a total
of 200 in each direction.
- Copy the signature onto it's own layer and place it in
the image.
- Add a uniform border to the image for the matt, again
using Canvas Size and change the dimensions to 2650x1850.
This time we added a 50 pixel border so that after the image
is trimmed, it'll fit under a matt.
- Finally, to change the aspect ratio, I used Canvas Size
to change the height to 2120 for a final resolution of 2650x2120.
In the next the last step I had a 2650x1850 image. Since
I added uniform borders I was changing the aspect ratio. In
the last step I adjusted only the height to bring the image
to the exact aspect of the final print. Since the width is
the dominant dimension I divided the width by the aspect ratio
I wanted to get the final height.
Holding my breath, hoping I hadn't had too many beers to
get all the math right, I saved the image as a maximum quality
JPEG, uploaded it and ordered a print. When I ordered the
print I selected the fit option.
While the image was uploading I had another thought. Canvas
Size doesn't resample the image, it only adds pixels. I didn't
have to worry about the original image degrading in any way
but another way of looking at it was, I was effectively doing
was adding resolution to the original image. To figure out
just how much I divided the final image width by the print
width.
- 2650 dots / 20 inches = 132.5 dpi
Again I used the width because that's the dominant dimension.
It seems that EZPrints, like most service bureaus, will give
you the best results with an image that is 100 to 150dpi.
The Result
I was still concerned that EZPrints might try to color correct
or adjust the image in some way. A quick email to support
confirmed that they print the image you upload "as is"
with no adjustments or corrections.
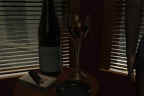
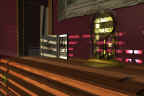
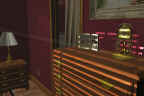
I was pretty impressed when I got the print in the mail a
couple days later. Ok, I went nuts. I couldn't believe the
detail I was seeing. I knew it was there because I built it
into the original model but it always seemed a little muted
when I looked at it on the monitor (even with the high resolution
renders). The color matching was nearly perfect as well, exactly
what I was expecting.
One quick warning though. At the same time I was working
with another friend who uses a Mac. Because of the differences
in gamma correction between the platforms, you have to be
careful. Make sure your monitor is correctly calibrated and
be aware of the gamma issue or your final print may look a
little washed out.
So ends the saga. :)
|